Libre7 min basaLesson 5 sa Ang app mo sa phone mo ngayong gabi
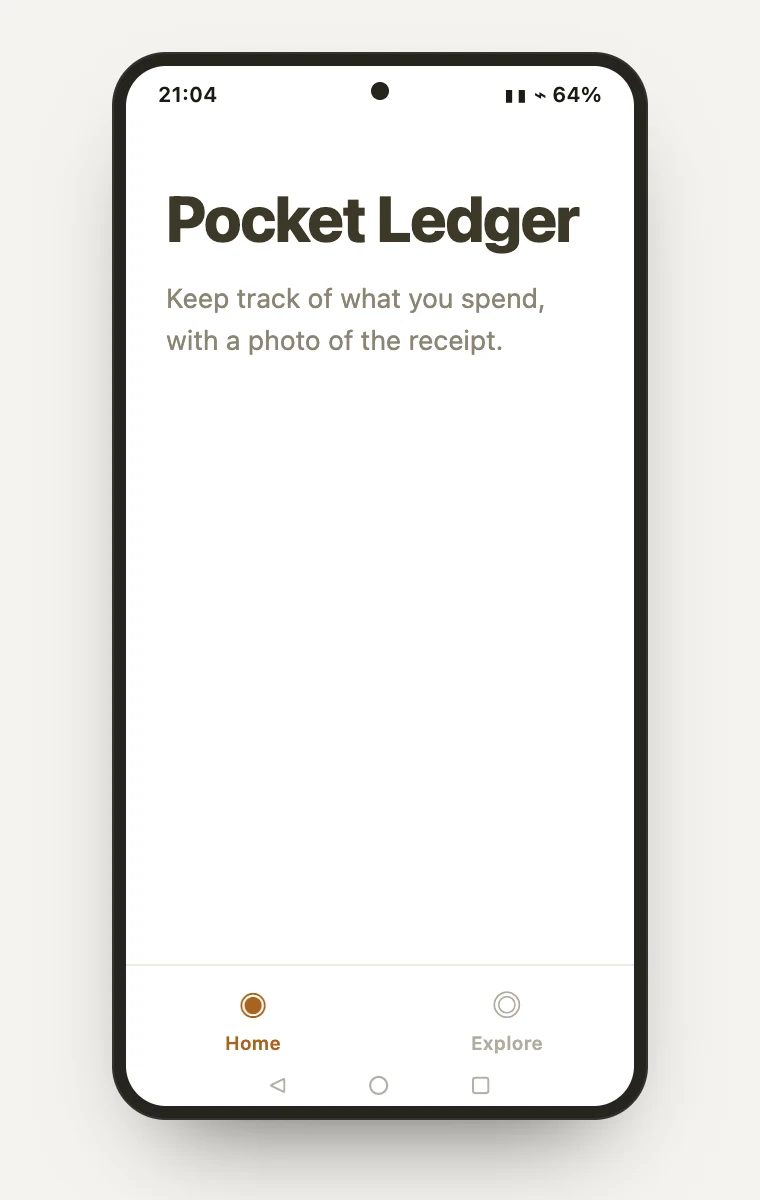
By the end of this lesson the home screen on your phone says your app's name, because you asked for it in a sentence and watched the phone redraw itself a second later. You will also have the two rules for talking to an agent about an app it cannot see, which is the difference between a five-minute fix and an hour of argument.
You need two windows open for this, and they stay open for the rest of the course.
In the first, the dev server from lesson 3, still running. If you closed it, cd into the project and run npx expo start again. In the second, Claude Code, started from inside the same project folder so it reads your rules.
The phone stays unlocked, on your desk, with Expo Go showing the app. You will watch it while you type.
Ask for the change
Give Claude this, in the second window:
On the home screen, replace the starter placeholder text with the app's name as a heading, and one line underneath saying what the app is for: keeping track of what I spend, with a photo of the receipt. Change only that screen. Do not add new screens, new packages or new dependencies.
Three things in that prompt are doing real work, and they are the pattern for every request you make from here.
It names the screen. Not "the app" — the home screen. An agent given a vague target changes more than you wanted.
It says what the result should be, in the words a person would use, rather than how to achieve it. You do not have to know what a component is to say "a heading and one line underneath".
Pagsasanay
Buksan ang Claude Cowork sa sarili mong computer at subukan ito sa totoong mga file. Nagtatapos ang bawat module sa isang checkpoint kung saan isusumite mo ang ginawa mo.
It says what not to touch. "Do not add new packages" is the single most valuable sentence you can put in a prompt this early. Left alone, an agent will happily install a UI library to change three words.
Claude will read a file or two, tell you which one it is changing, and ask before writing. Say yes.
Watch the phone
Do not switch to the phone after it finishes. Watch it while it finishes.
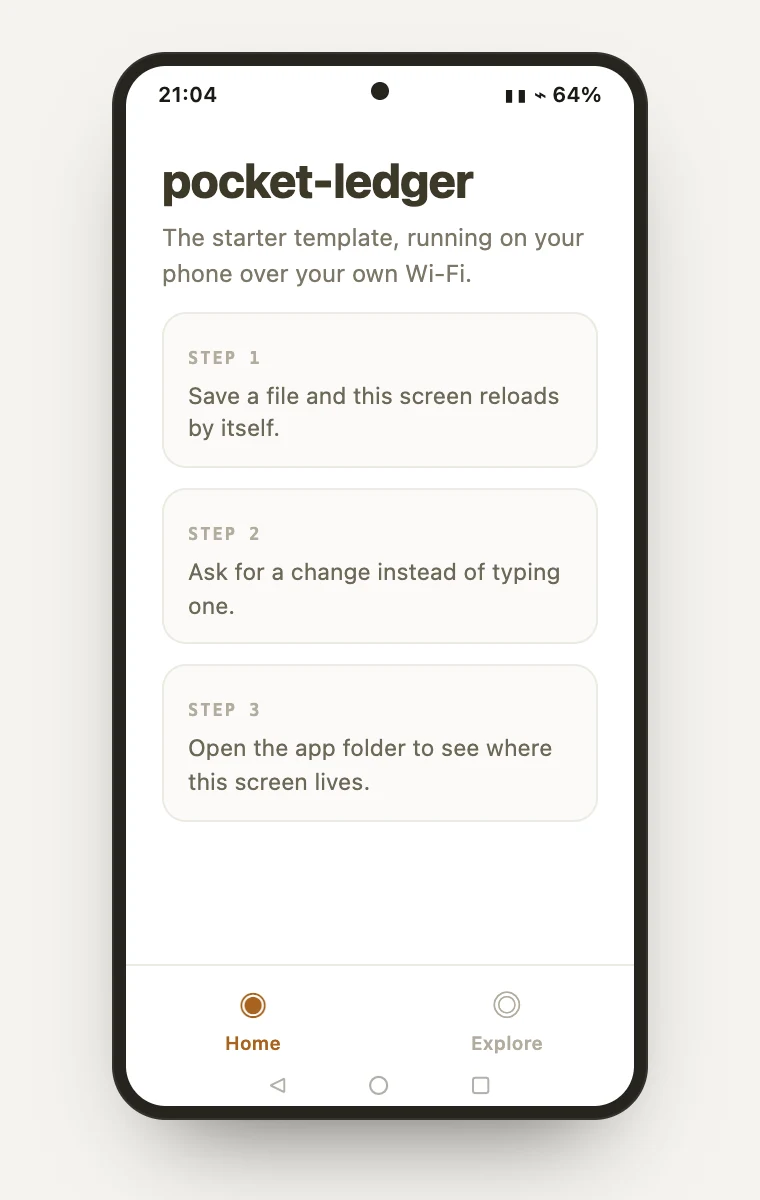
The moment the file is saved, Metro — the dev server in your first window — notices, rebuilds, and pushes the change down the Wi-Fi. The screen in your hand redraws in about a second. Nobody warned it. Nobody pressed anything.
BeforeAfter
One sentence, one save, one second. The reload is automatic — the value of the dev server is that you never think about it again.
That loop is the entire working method of this course, and Expo describes it in four steps worth learning by name:
Prompt. Say what you want in plain words.
Build. The agent writes the code and the app updates on your phone within seconds.
Verify. Check on the phone that it does what you asked. Not in the terminal — on the phone.
Re-prompt. If something looks off, tell the agent what you see and let it fix it.
Step three is the one people skip, and it is the one that keeps you out of trouble. The terminal saying "done" is not evidence. Your phone is.
The two rules
Both come from Expo's own tutorial, both are correct, and both follow from one fact: the agent cannot see your phone. Everything it believes about that screen, it believes because you told it or because it guessed.
Describe, do not diagnose. Tell it exactly what you see and what you expected. "The text is centred but the background is still white" is a useful sentence. "I think the style prop is not being applied" is not, unless you are sure, because you have handed it a theory to defend instead of a symptom to fix. Non-developers apologise for this constantly and should not — describing is the more useful skill, and you already have it.
Paste errors verbatim. If the phone shows a red error screen or the terminal prints an error, copy the whole message in. Not a summary, not the first line, not "it says something about a module". The stack trace underneath carries the file name and line number, which are the parts that locate the bug.
A third rule follows from the same fact, and it is worth adding to AGENTS.md later: never accept a statement about what is on your screen. An agent that says "the button is now blue" is guessing. Ask it how it knows. Module 4 gives it a way to actually look; until then you are its eyes.
Try the loop once on purpose
Make a second, smaller request, so the loop becomes muscle memory:
Make the heading larger and the line underneath a lighter grey. Nothing else.
Watch the phone. If you do not like it, say so in the same plain terms — "the grey is too light to read in sunlight" — and let it adjust. That exchange, three or four times over, is what building an app looks like for the rest of this course.
I-check ito
The dev server and Claude Code are running in two separate windows
Your app's name is the heading on the home screen of the phone
The phone updated on its own, without you touching it
You made a second change and watched it arrive
You can state both rules — describe rather than diagnose, and paste errors whole
Kung makikita mo The phone did not change after the file was saved
Check the dev server window is still running — an accidental Ctrl+C in the wrong window stops it silently. If it is running, press r there to force a reload. If the phone still shows the old screen, close Expo Go completely and scan the QR code again; the connection can drop when a laptop sleeps or a phone switches Wi-Fi networks.
Kung makikita mo A full-screen red error appeared on the phone
That is a render error and it is completely normal. It is also the best kind of failure, because the message names the file and the line. Copy the whole thing — the message and the stack under it — into Claude and add one sentence about what you had just asked for. If two attempts do not fix it, ask it to undo its last change rather than continuing to pile fixes on top of a broken screen.
What you just learned
A change is a sentence naming the screen, the result you want, and what not to touch.
Saving triggers Metro to rebuild and push to the phone automatically, in about a second.
The loop is prompt, build, verify, re-prompt — and verify happens on the phone, not in the terminal.
Describe what you see rather than diagnosing the cause, because a theory is harder to correct than a symptom.
Paste errors whole, stack trace included, since that is where the file and line number live.